NEWS
News information
Subcategory:
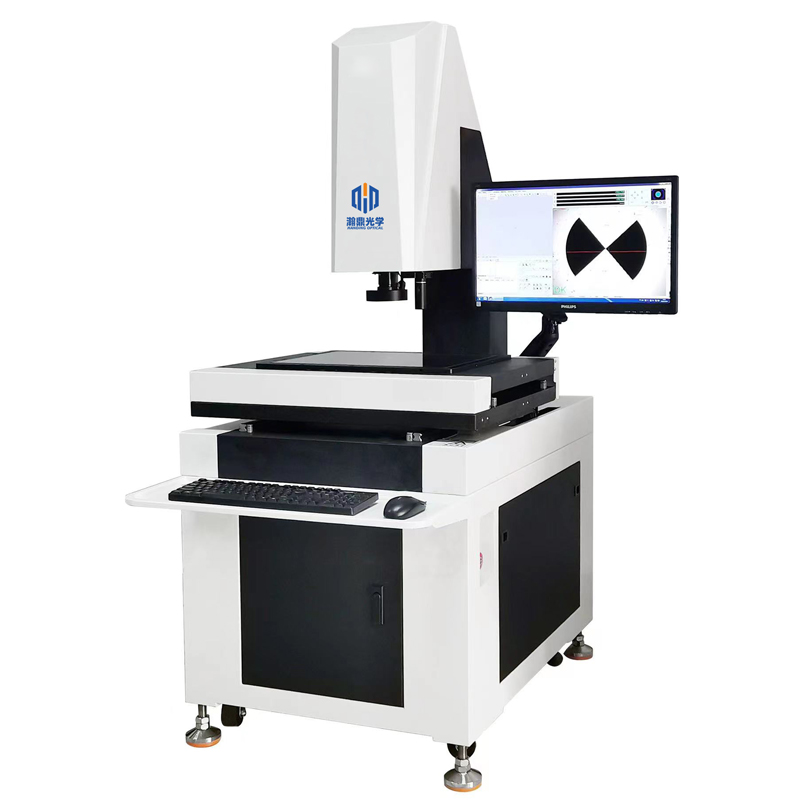
Quadratic measuring instrument, also known as image measuring instrument, is used to measure the plane size and shape and position tolerance of the product, the measurement elements include position, concentricity, straightness, profile, roundness and the size related to the reference. The following Handing will share the content of the method and measurement error of the automatic quadratic measuring instrument to measure the height of the workpiece.

Automatic two-element measuring instrument measuring workpiece height method:
1, contact probe height measurement:
The height of the workpiece is measured by a contact probe mounted on the Z-axis (but this method requires the addition of the corresponding module on the quadratic imager software), and the measurement error can be controlled within 5um.
2, non-contact laser height measurement:
A laser probe is installed on the Z-axis to measure the height of the workpiece with a non-contact laser (but this method requires the addition of the corresponding module on the quadratic imager software), and the measurement error can be controlled within 5um.
3, image height measurement method:
The height measurement module is added to the software of the quadratic measuring instrument, a plane is adjusted clearly by using the focal length, and then another plane is found. The difference between the two planes is the height to be detected, and the system error can be controlled to within 6um.
Measurement error of automatic quadratic measuring instrument:
1, principle error:
The principle error of the image measuring instrument is: the error caused by the distortion of the CCD camera and the error caused by different measurement methods. Camera manufacturing and process and other reasons, incident light through each lens refraction error and CCD lattice position error, there is nonlinear geometric distortion in the optical system, so that there are many types of geometric distortion between the target image point and the theoretical image point:
Radial distortion, eccentric distortion, thin prism distortion, and so on, and the radial distortion is large, tangential distortion and thin prism distortion is small, and the image center distortion is small, the edge distortion is large. The use of high quality lenses can reduce the effect of distortion error, but it is necessary to take into account the effect of distortion to correct the measurement results in precision measurement.
The errors caused by different measurement methods mainly refer to the identification and quantization errors caused by different image processing techniques. The edge of the image is the basic feature of the image, which is the reflection of the outline of the object or the interface between the different surfaces of the object in the image. Edge contour is an important factor for human to recognize the shape of objects, and it is also an important object in image processing.
In the process of image processing, edge extraction is required, and there are many different methods of edge extraction in digital image processing technology. Different extraction methods will have a large change in the edge position of the same measured part, so it will have an impact on the subsequent measurement results. For example, when the radius and center of a circular workpiece are measured, when the outline of the circle changes, the edge of the workpiece will be changed. Its radius value and the position of the center of the circle will change accordingly. It can be seen that in the process of image processing, the image processing algorithm has a very important impact on the measurement accuracy of the instrument, which is the focus of image measurement.
2, mechanical error:
The manufacturing errors of the image measuring instrument are: errors generated by the guiding mechanism, installation errors, etc. The error caused by the guiding mechanism is mainly the linear motion positioning error in the mechanism error for the image measuring instrument. Image measuring instrument is an orthogonal coordinate system measuring instrument. The orthogonal coordinate measuring instrument has 3 mutually perpendicular axes (that is, X, Y, Z three axes), and 3 moving parts move along these three axes, so that the CCD moves in a three-dimensional straight line relative to the measured workpiece.
The use of high-quality motion steering mechanism can reduce the impact of such errors. If the horizontal performance of the measuring platform of the image measuring instrument and the installation of the CCD camera are excellent, the Angle between them is within the range, and the error is very small.
3. Operation error:
The operating errors of the image measuring instrument are: errors caused by changes in the measuring environment and conditions (such as temperature changes, voltage fluctuations, lighting conditions changes, mechanism wear, etc.), and dynamic errors. Due to the change of temperature, the size, shape, mutual position relationship and some important characteristic parameters of the parts of the image measuring instrument change, thus affecting the accuracy of the instrument.
The change of temperature may also cause the change of electrical parameters and the change of instrument characteristics, resulting in temperature sensitivity drift and temperature zero drift. The variation of voltage and lighting conditions will affect the brightness of the upper and lower light sources of the image measuring instrument, resulting in uneven illumination of the system, which will leave shadows on the edge of the acquired image and cause image edge extraction errors. The wear causes the size, shape and position errors of the parts of the image measuring instrument, increases the fit gap, and reduces the stability of the working accuracy of the instrument. Therefore, the improvement of measurement operating conditions can effectively reduce the impact of such errors.
Han Ding offers a one-stop service from needs analysis, product solutions, usage guidance, to after-sales tracking

Address:No. 98, Zhen'an East Road, Chang'an Town, Dongguan City, Guangdong Province, China
Mobile:+86-130 3887 8595 / Aico Ding
Email:handing3d@163.com